How to Screen Print Shirts with Stencils {DIY}

DIY screen printing is an enjoyable activity for beginners and advanced crafters alike. Once you learn the basics, you can easily master more advanced techniques. You can print on various surfaces using a variety of techniques, but this tutorial will focus on screen printing t-shirts using stencils.
Materials:
- T-shirt(s)
- Speedball screen printing ink for fabric
- Speedball screen printing frame
- Squeegee
- Stencil(s) (store bought or handmade)
- Painter’s tape
- Newspaper or cardboard (something to place inside the shirt to prevent ink from soaking through)
Optional (for making your own stencils):
- Paper (or Clear stencil film)
- X-acto knife (or Stencil cutter)
- Cutting mat (or glass surface)
What is Screen Printing?
Screen printing is a method of printing where you apply ink through a fine-mesh screen onto a surface. The image is a result of blocking parts of the screen with a stencil or by creating an image directly on the screen with drawing fluid or screen filler. You can print on a variety of surfaces such as wood, paper, cardboard and fabric. Fabric screen printing ink is best for fabric, because it can be heat set and won’t wash out when laundered. Acrylic screen printing ink is used for other surfaces.
Screen Printing Using the Stencil Method
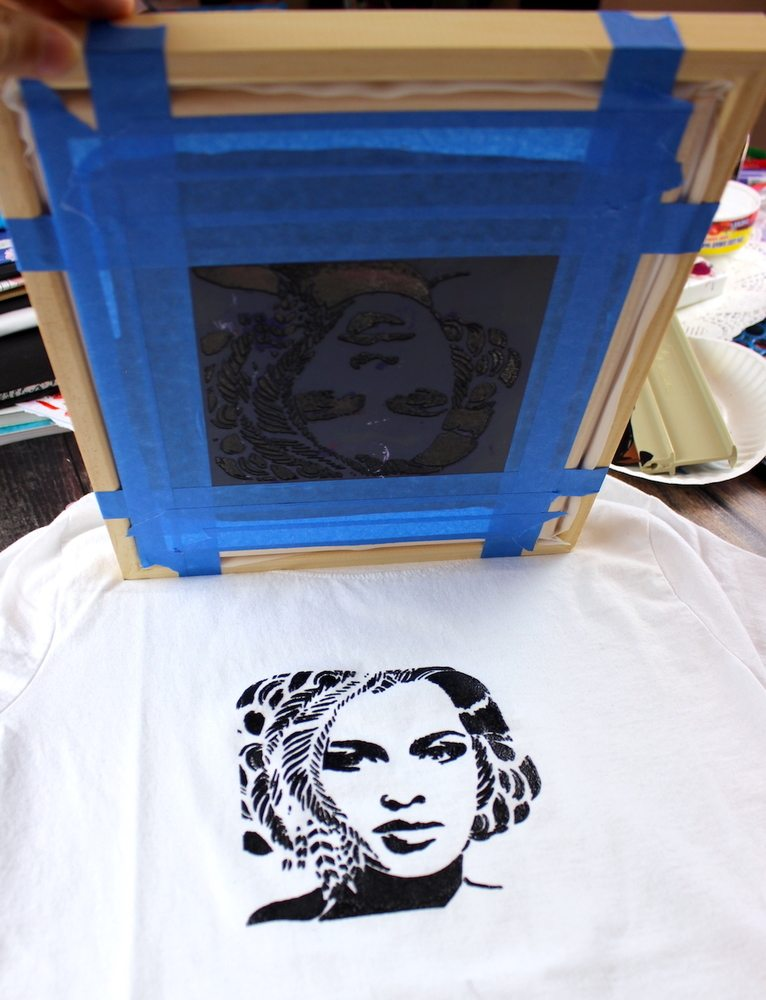
Wash and dry your t-shirt before screen printing. It’s best to print on clean, dry and wrinkle-free material. Prepare your screen by taping the stencil front-side down onto the back (flat side) of the screen. This will ensure that when you print, your design comes out the right way. This is especially important when printing letters, words or numbers.
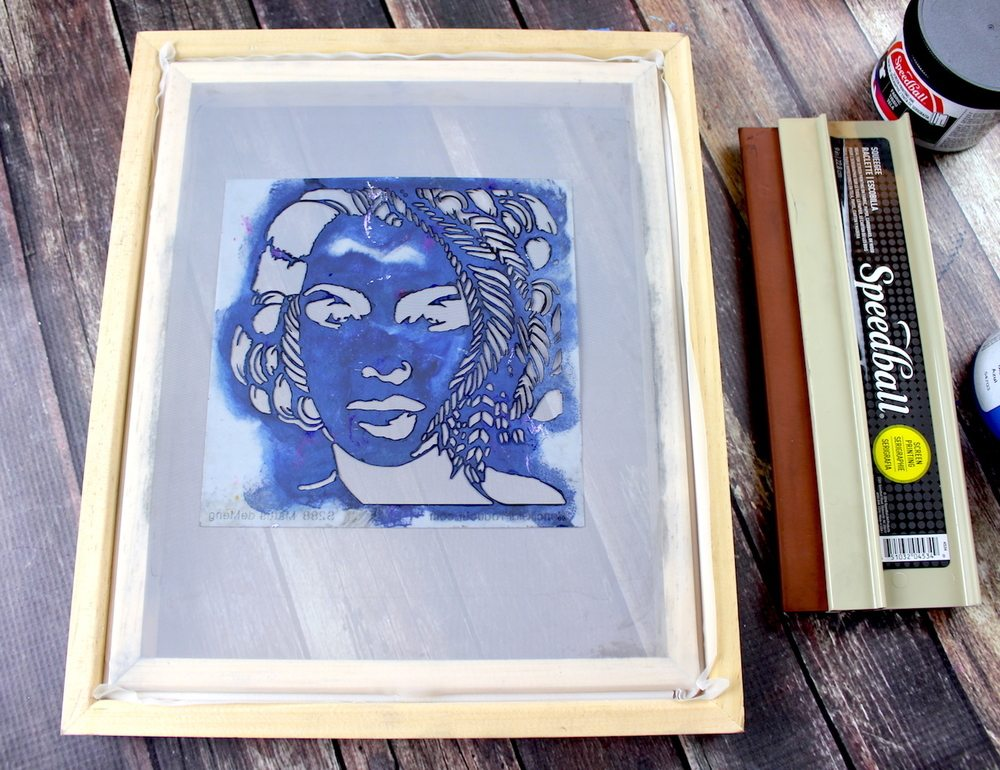 Place the stencil face down onto the back of the screen.
Tape up any gaps around the stencil with painters tape. This will ensure that the ink only goes through the design in the stencil and not through any other part of the screen. Make a test print on paper to see how your design will look when printed.
Tape your stencil front-side down onto the back of the screen.
To make a test print, place your screen (flat side down) onto a scrap of paper with the image facing up.
Screen is placed flat side down onto the surface.
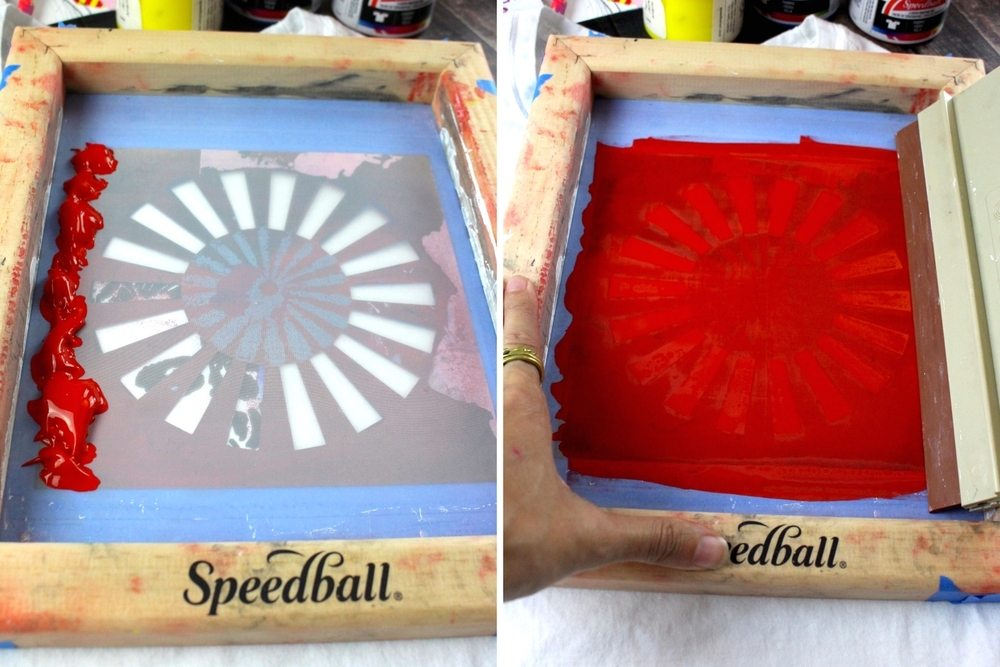
Place a generous amount of ink along the side of the image (you can also place it along the top, only if your screen is large enough to fit the squeegee. In this example, the screen is 8x10” and the squeegee is 9”, so the only position that would work is to scrape the ink from side to side instead of up and down. Either way is fine). Use the same color ink that you will be using for your final print, so that you don’t have to clean up between testing and actual printing.
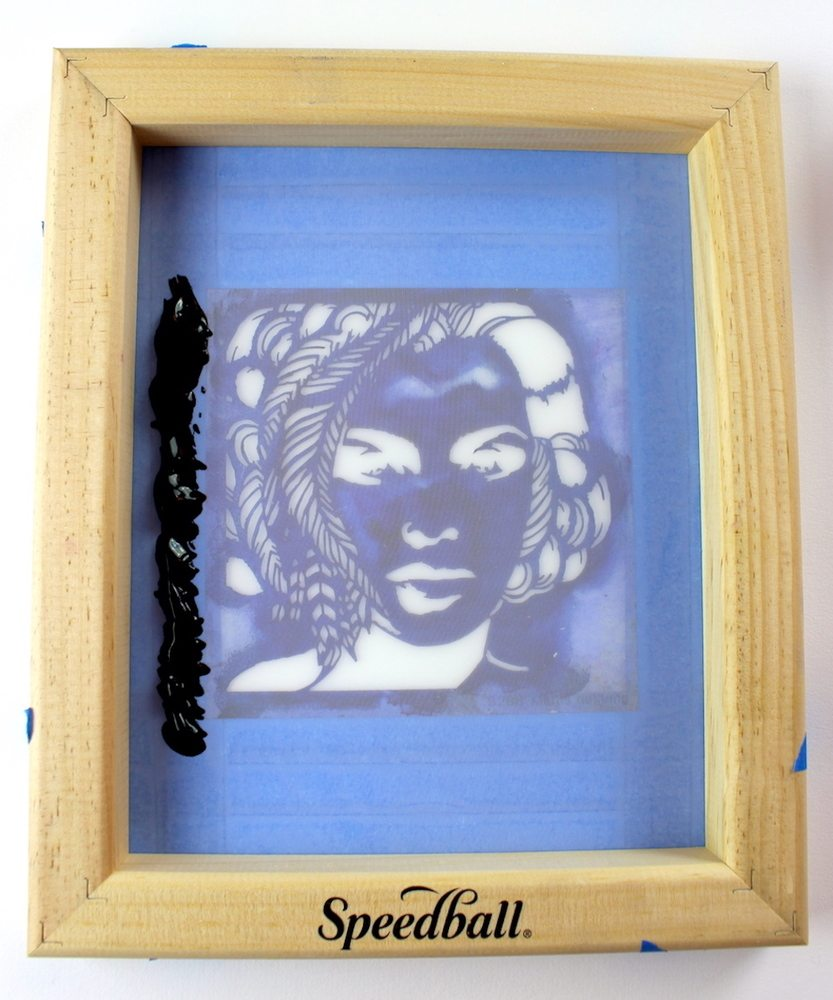 Add a generous amount of ink off to the side of the image.
Firmly hold the screen down with one hand while you scrape the ink across the stencil with the other. Be sure to press hard on the squeegee so that all of the ink goes through the screen and through the stencil. You may have to pass over the image one or more times to ensure an even application of ink.
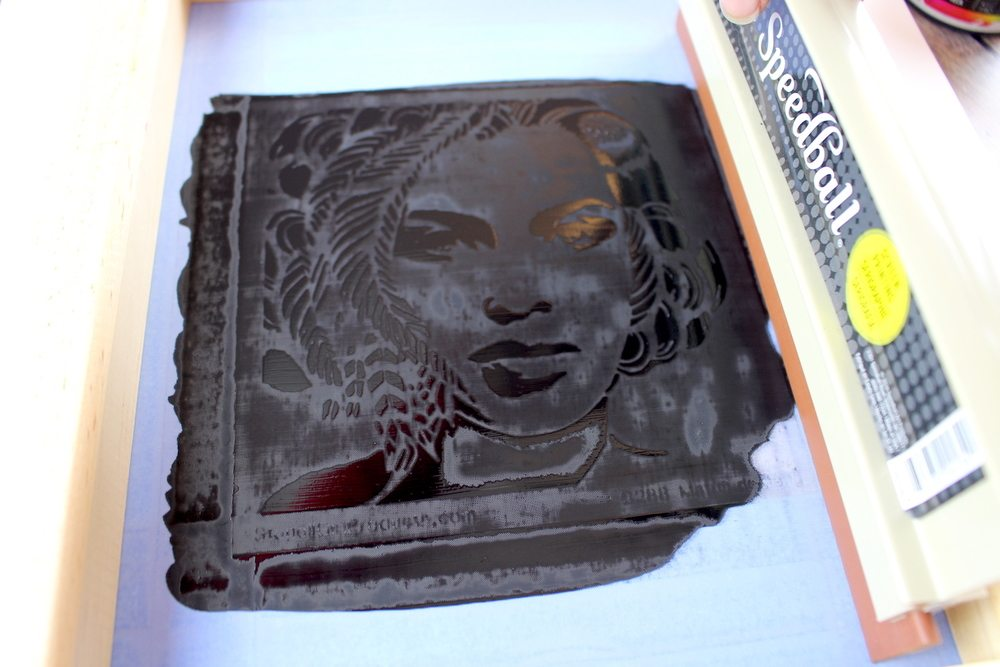 Firmly press the squeegee against the screen as you drag the ink across the surface.
Lift up to see your design! The image will not be as crisp as when printing on fabric. That’s OK--the test is just to see if all of the ink can be pushed through the screen and stencil and also to test out placement for your final design. Set this print aside, as you may need it later to use as a mask if you’d like to print more images in different colors around the main image. If you are satisfied with your design, you’re ready to screen print onto your t-shirt!
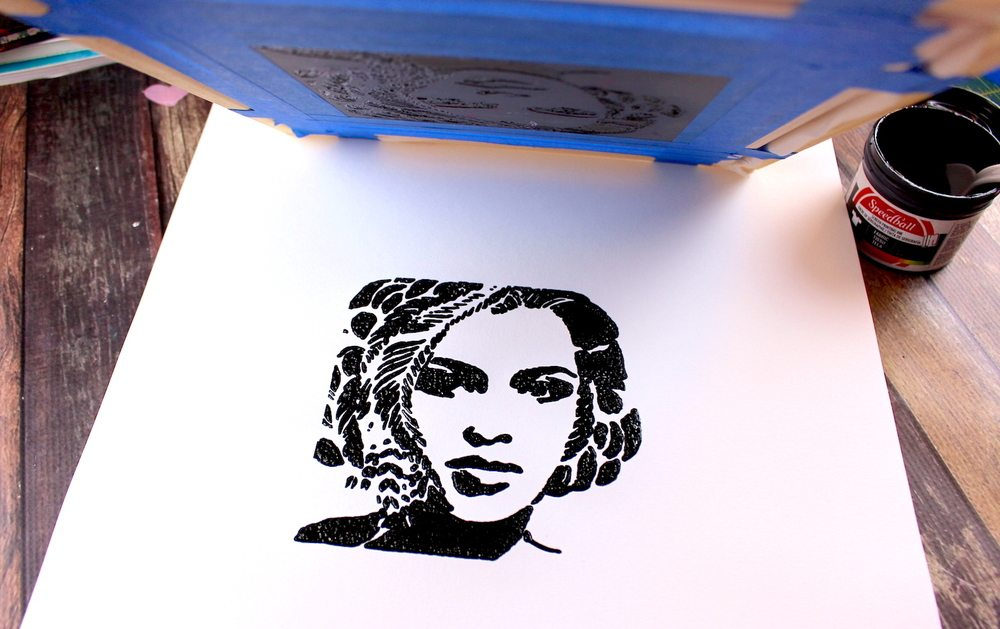 Testing fabric ink on paper will not produce a crisp image, but that is OK, for testing purposes.
Before screen printing on your t-shirt, place a piece of paper, cardboard or newsprint inside the shirt. This will ensure that the ink does not leak through to the other side of your shirt. Place the screen onto your shirt. Center the image. Repeat the same steps as the test print.
Place the screen onto the shirt. Repeat same steps as the test print.
Hold your shirt down with one hand as you lift the screen up with the other to reveal your print! It may take a few tries to get it right, or you may get a great print on the first try. In any case, it’s a good idea to purchase an inexpensive pack of shirts to test on first. You can also keep any “mess ups” and use those shirts as test material for future prints. Use a fine-tip brush to paint in any areas that may have been missed.
You can print several shirts in a row with the same pattern and color. Work quickly so that the ink doesn’t dry on the screen. When you’re finished printing, clean the screen immediately. Remove the tape and stencil and set aside. Run the screen under warm water and rinse off the ink. Use a toothbrush and soap to scrub away any remaining ink. If the ink dries on the screen, it cannot be removed and will diminish the quality of future prints. Remove the rubber end from the squeegee and rinse under warm water. Let all materials dry before printing again.
Printing Multiple Images/Colors
Once the first print is dry, you can add more designs in different colors. Cut out the test image and tape it over the printed image on the shirt. Tape the second stencil to the screen. Position the screen over the image, overlapping it a little. Print the image. If some parts of the design are missing, paint them in with a small, detail brush. Let dry as before and add more designs and colors as desired.
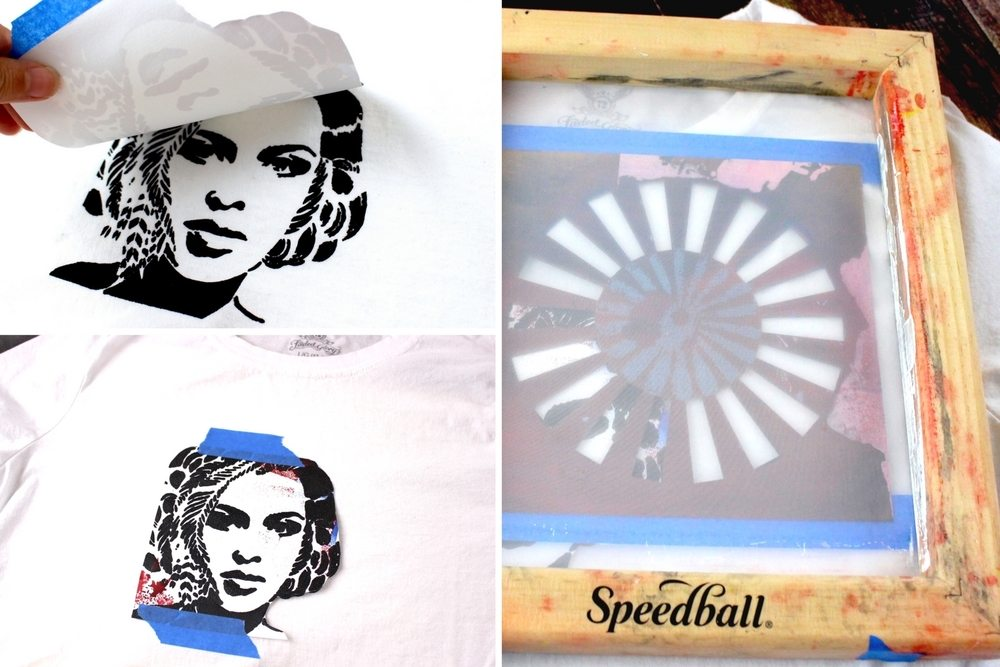 To print additional images/colors, cover original image with a paper mask. Position the second image over the first.
 Place second ink color onto screen and spread ink across.
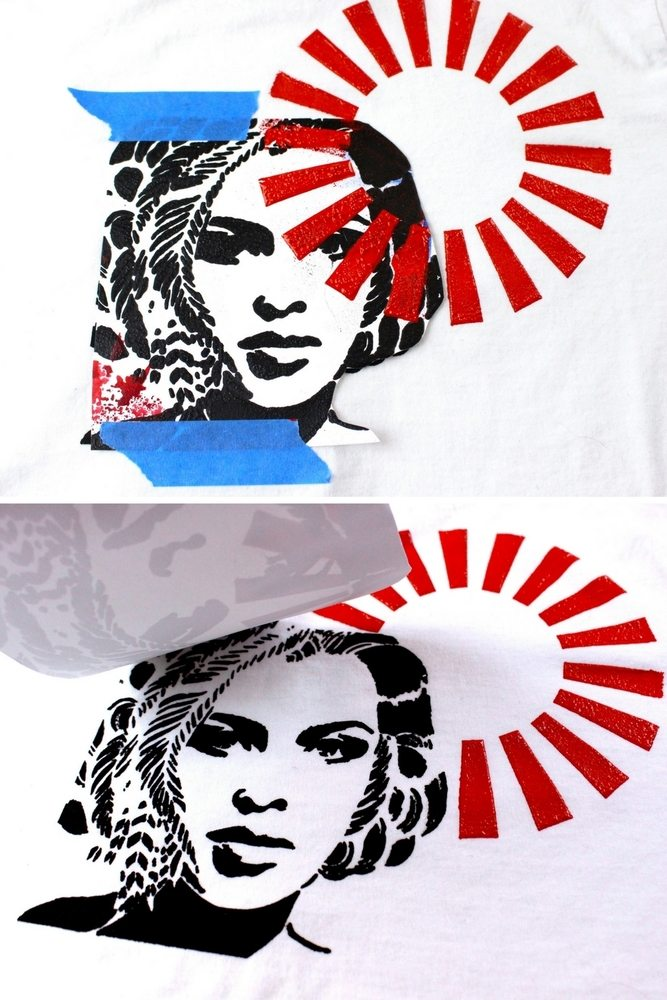
Carefully remove the paper mask to reveal the new design.
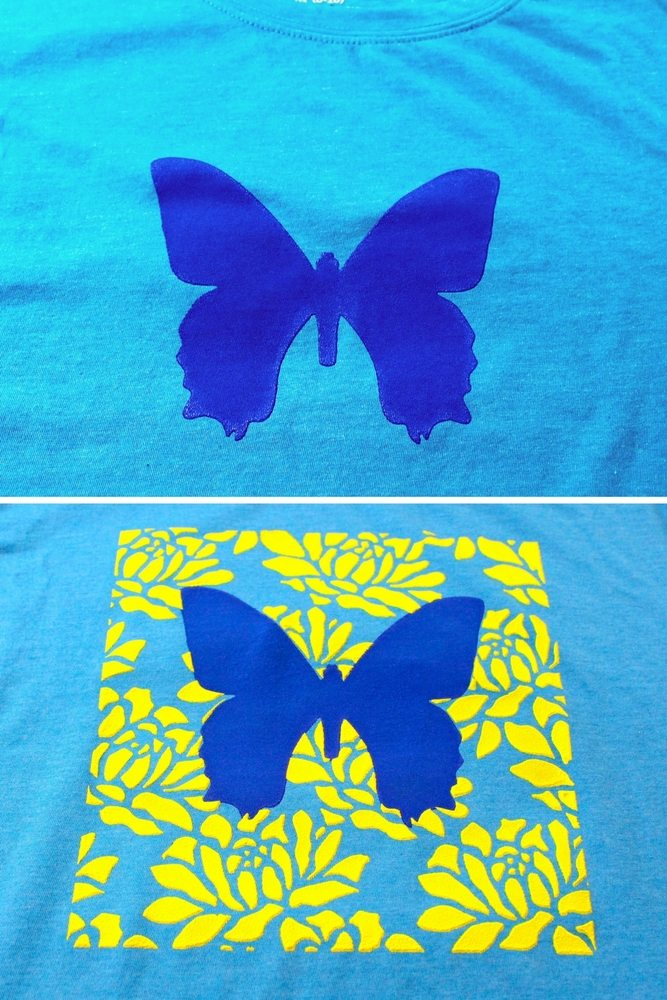
First print the butterfly in blue. Let dry. Cut out a mask to cover the butterfly. Print floral background in yellow.
Clean-up and Fabric Care
Once your shirt is completely dry, you can heat-set your image onto your shirt and make it machine washable. Set your iron to the cotton setting (no steam) and place another piece of cloth or paper on top of the shirt. Iron over the printed image on both sides (inside and out) for 3-5 minutes on each side.
It’s that easy to learn how to screen print your own custom shirts! Have fun making your own unique t-shirt designs.
Thanks for taking the time to read this post. We’d love to hear from you! Please leave a comment below and let us know your experiences with t-shirt design software.
Pin this post for later!